So first I'd like to say, "Sorry for skipping around".
The jacket muslin has been cut, but I had been taking the Craftsy "Couture Dress Class" with Susan Khalje, and I thought, I really should share this while it's still fresh in my mind.
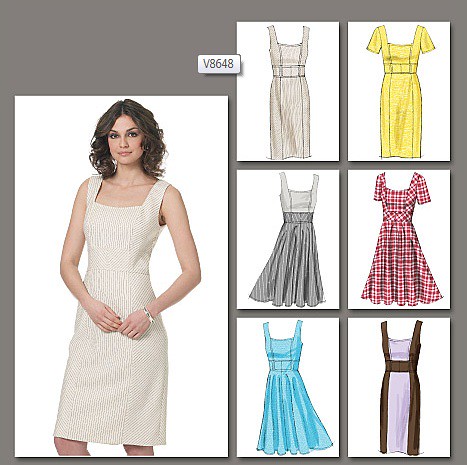
Here is the pattern recommended for the class, it's nice and basic, with princess seams.
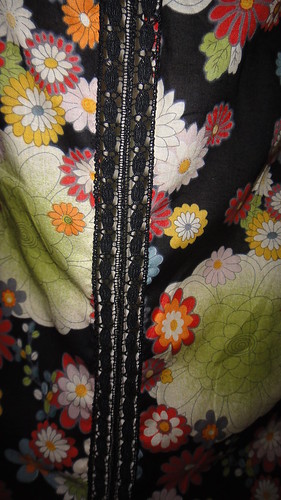
Depending on the fabric can be dressed up or down.
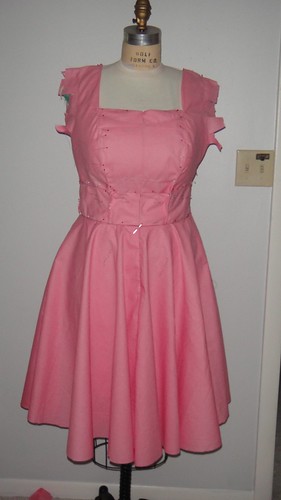
Now I normally need an FBA but elected not to make any adjustments to the pattern to see how that went.
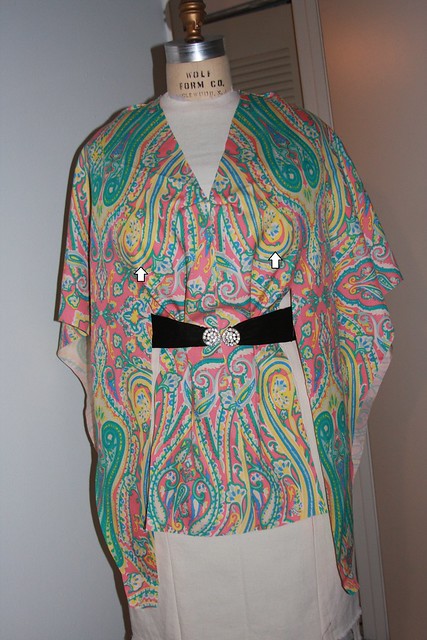
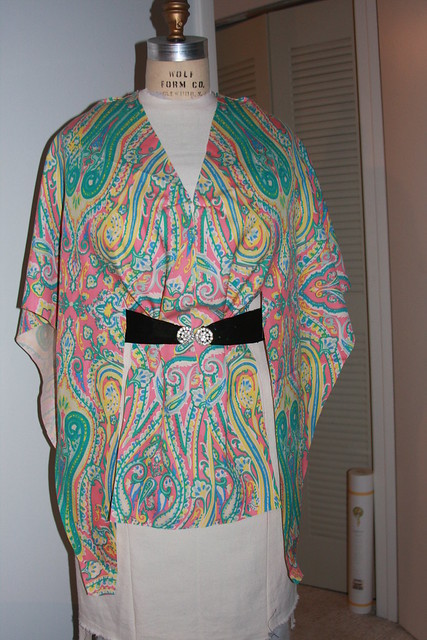
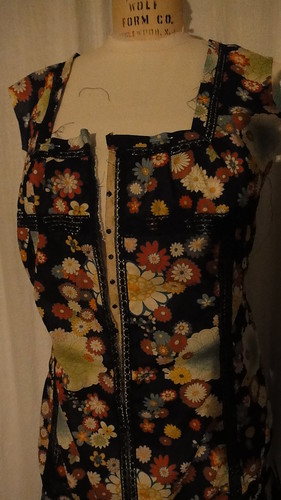
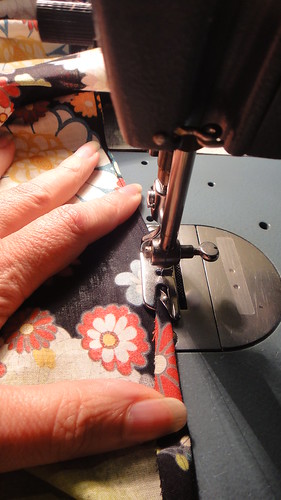
Yeah, I wasn't impressed either, if I had no experience, or was impatient, I would have considered the course, and the pattern a dud. It's tight across the bust, the curve is too angled and there is pulling at the top of the neckline Ugh what was I thinking... Sometimes though you need to step back, have a cup of tea and take it slowly. The plan of attack.... I decided to leave the skirt off and tackle one section at a time, so the bodice was first.
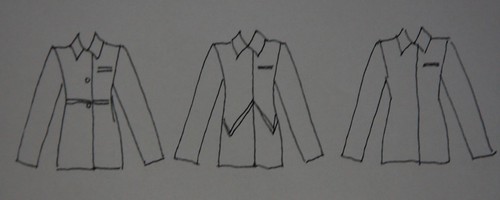
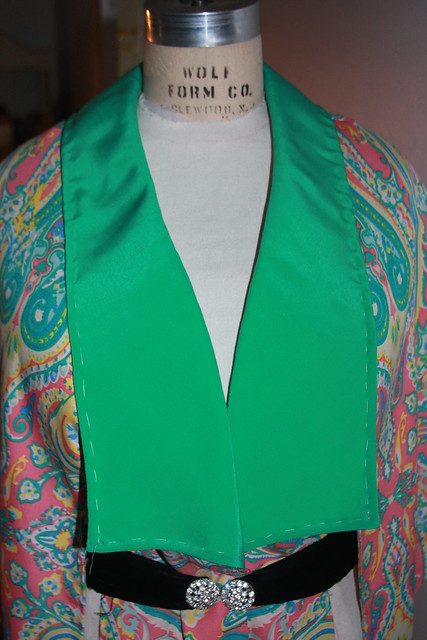
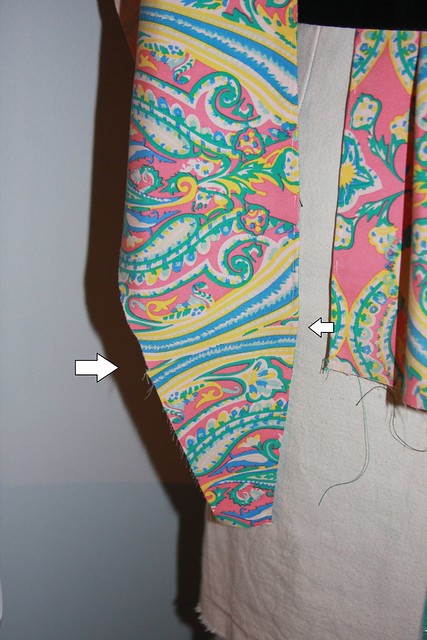
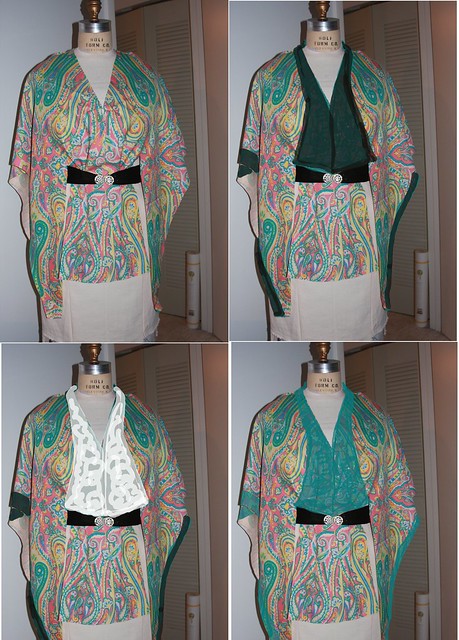
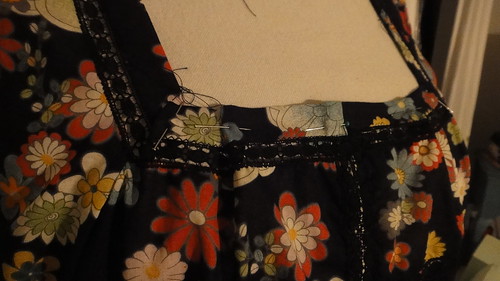
From left to right,
left - original pattern no alterations,
middle - waist piece removed - shaping of the bust on the left side only
right - waist piece added back - shaping of the bust both sides, and a little shaping at the waist and under bust
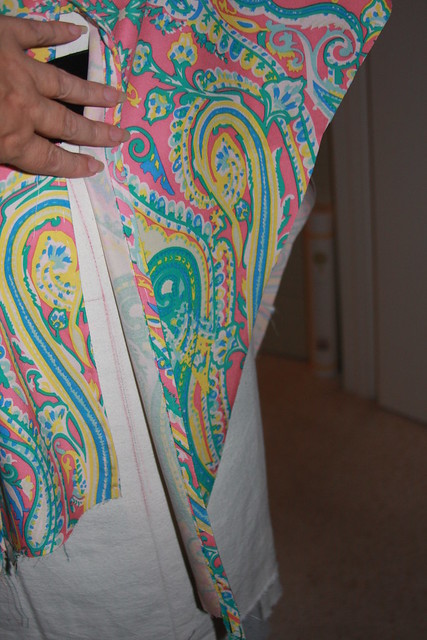
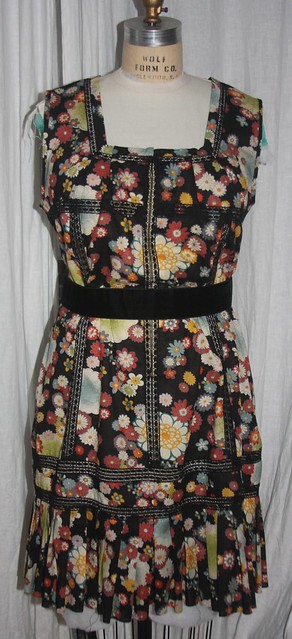
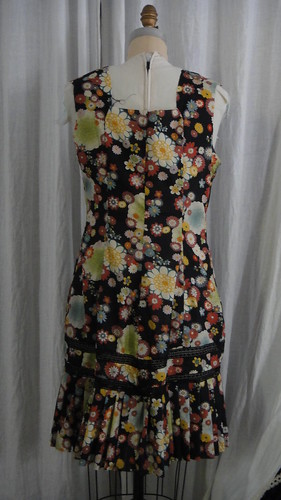
skirt attached...
If you are thinking about taking this class, get yourself on their mailing list, they frequently have 50% off sewing classes.
Saturday, March 31, 2012
Wednesday, March 28, 2012
I won a Giveaway!!
Over at Allison C's Sewing Gallery blog, she had a giveaway in January, and I won!! I really need work clothes, I have exactly one jacket in my wardrobe that fits. Allison makes a lot of jackets, and a lot of other things as well. She does a lot of pattern reviews and even shows adjustments she's made. She's a perfect model and the blog features good photographs (I'm sorry to say I sometimes fall short, especially with those projects that get completed in the wee hours of the morning).
Here's the pattern she generously sent me.
The jacket - semi fitted partially interfaced, lined, below hip jacket has collar, shoulder pads, welt, piping and longer than regular length, two-piece sleeves with fold back cuffs.
The pant - Straight legged lined pants have contour waist, side pockets and back zipper.
It will be my first Bill Blass pattern and I'm already thinking of the changes I'd like to make to the lines. I like the seaming detail on the front, but may make them symmetrical, now to pick a side.
Since it's for work, I'll keep it in a neutral palette, Navy always works for me, but the muslin version will be one of my mystery fiber fabrics.
Stay tuned!
Sunday, March 25, 2012
VPLL #0291 1912 Ladies Wrap Finished Finally
And she walked softly through the night....
This is my fancy tassel, my first tassel, I should have ironed the thread before forming the tassel, like Martha Stewart suggested on her website (doesn't she ever tire of being right?).
I hope to steam it straight, but I like that it almost looks like a woman walking with a cape (you have to squint).
This is what they look like without the mother of pearl bead and uncut.
I could see this over a pair of jeans and a white t-shirt. It has a lot of possibilities.
The pattern was sent as a size 36 Bust, since it was a wrap, the "sleeves" fall on the bias, and the sides are not closed.
The 1912 patterns have an "Oriental" influence, and this pattern looks like a stylized Kimono.
I really love the sleeves or wings. I was really surprised to find this one from the 1800's, we really don't invent fashion it's all recycled, so now we've come full circle 1800's, 1900's, 2000's. Metropolitan Museum of Art's archives.
I had to learn how to make tassels out of rayon embroidery thread.
I finally was able to use some mother of pearl beads in the stash.
Happy to save fabric that would have been a muslin and make it into something fun.
Wednesday, March 21, 2012
VPLL Wrap progress... fabric scarier still
So here is the progress on the VPLL wrap project, as you can see, basting stitches everywhere, so we have many hours ahead before it's finished.
Found a scrap of green crepe de chine for the contrast fabric (which is a miracle because it matches so well), with less than 1 yard, the top collar and sleeve trim was cut.
So we had a few scares along the way, like the unfortunate placement of the yellow swirls.
The fabric width being narrower than 60", meant the need for two pieced areas placed at the back of the sleeves.
The finished edges, which were bound in self bias, the instructions do not recommend this, they give you an option of turn under and stitch or lining. Lining might be the way to go next time, there was a lot of hand finishing in the self bias.
All in all a successful project, I hope the recipient enjoys it... wait a minute.... is that a scull staring back at me? It's like Alexander McQueen is lurking here.
Saturday, March 17, 2012
VPLL #0291 1912 Ladies Wrap and the scary fabric.
The wrap as drafted doesn't meet at the side waist, this is a true wrap, not a little jacket or shrug. That was the most difficult concept to understand, because I really wanted it to meet. The front and back have soft tucks making the bodice even narrower still. Taking the time to study the pattern and illustration pays off.
Fabric selection was tricky for this because I wanted to make this for someone else. Then it was figuring out what color palette would be good for them and if I had inventory of it.
So I present to you the fugliest fabric ever. I'll be fair, it's a silk cotton twill and the fabric itself is pretty fabulous, but the print is a psychotic Rorschach test blot. There is a misprint and it is not symmetrical. However, I like it so much in this example that I'm considering leaving the contrast collar off.
It's just pinned on the form, so now it's a question of how I want to finish it.
Don't you just love photoshop?
Sunday, March 11, 2012
Buckingham Palace Lady Di's Dress Exhibit
Well now I'm sorry I didn't book a flight to London. If you are in London or are planning on going before March 26th, you might want to step by Buckingham Palace, in addition to the Lady Diana Dress exhibit, they are also showcasing the recent 12M£ renovation.
You can read about it here at Express.co.uk
more at NY Magazine online.
You can read about it here at Express.co.uk
more at NY Magazine online.
Monday, March 5, 2012
VPLL Challenge pattern #0336 Ladies Princess Slip - finished
Well due to all the hand sewing and tweaking it took longer than I thought but it is finished now.
It's finally been pressed, seam allowances trimmed, loose threads removed and it looks all the better for it. It's a fun flirty lightweight summer dress.
I found a vintage velvet ribbon belt for the photo shoot.
Next up is the first "Official" group pattern for the project, the afternoon wrap.
As you can see, it is a size 32 bust, so there will be some weird science going on here to get it to fit me.
Saturday, March 3, 2012
VPLL Challenge pattern #0336 Ladies Princess Slip - Progress 2
I should be finished but I'm not :)
When last we left the slip there were still a few things that needed to be solved.
1) Front closure
2) Neckline treatment (without the lace / ribbon insertion)
3) Flounce hem
4) Armhole finish - this will be the next post with the finished garment.
1) The front closure - check!!
I inserted the selvage of a silk dupioni about 1" wide and sewed tiny (but freakishly strong) snaps to it. The other side of the snap hides behind the opaque oval in the lace. It looks pretty good and a bit vintagey.
2) Neckline - check!!
Joined the 1/2" lace around the neckline, then prepared a 1" wide tube of the same fabric and added that. This would have been where I would have inserted the ribbon, the slip gapes outward along this edge, so I've added little back pleat, and two small pleats in the front to keep it from falling open.
3) Flounce hem - check!!
Now this one I am excited about, since the flounce is cut on the straight and it is 180" long, I wasn't going to finish it by hand. This turned out to be a real time saver.
I remember when my mother bought this attachment, she was so excited. When I was younger I loved wearing long fluid full circle skirts and mom used to finish them by hand. This is what she bought the attachment for, and she said it took a bit to get the hang of it but it went very quickly once she did. This is when you need sewing friends, to gush about new attachments LOL.
It makes the nicest tiny hem ever.
Here is a most excellent tutorial on youtube from Brian Sews.
And 180" took 7 minutes.
Do I dare use it on the armholes?
Thursday, March 1, 2012
VPLL Challenge pattern #0336 Ladies Princess Slip - Progress
I really wanted to have this finished today but I've run into a few issues. First, the lace required for this project is 1" and 2". I found some lace in the stash but it wasn't the proper width, so I decided to sew them together for this project.
I really liked the top combination so started preparing the laces, since this was in my mother's stash, it was in a big ball. I untangled it, and wound it on a cardboard. Then I decided to press it, so that I could start making strips and this is what happened.
Cotton rot, it shredded as I extended it, so that was out.
Well then one type of lace it is.
This has taken a lot of time, and a lot of thread.
Here's where I am...Front
and back!
I don't have the ribbon insert lace in a proper color, and I've left the front open so that I can get in and out easily. There is still plenty to do on what I thought would be a simple little project.
Subscribe to:
Posts (Atom)